First, let's find the Telnet program, which is called "Putty".
In the old lab (leonardo 205):
Select: my computer > Datafiles Z: > CAOT 97 > Putty
In the new lab (admin 316):
Putty will be an icon on the disktop. Double click to start.
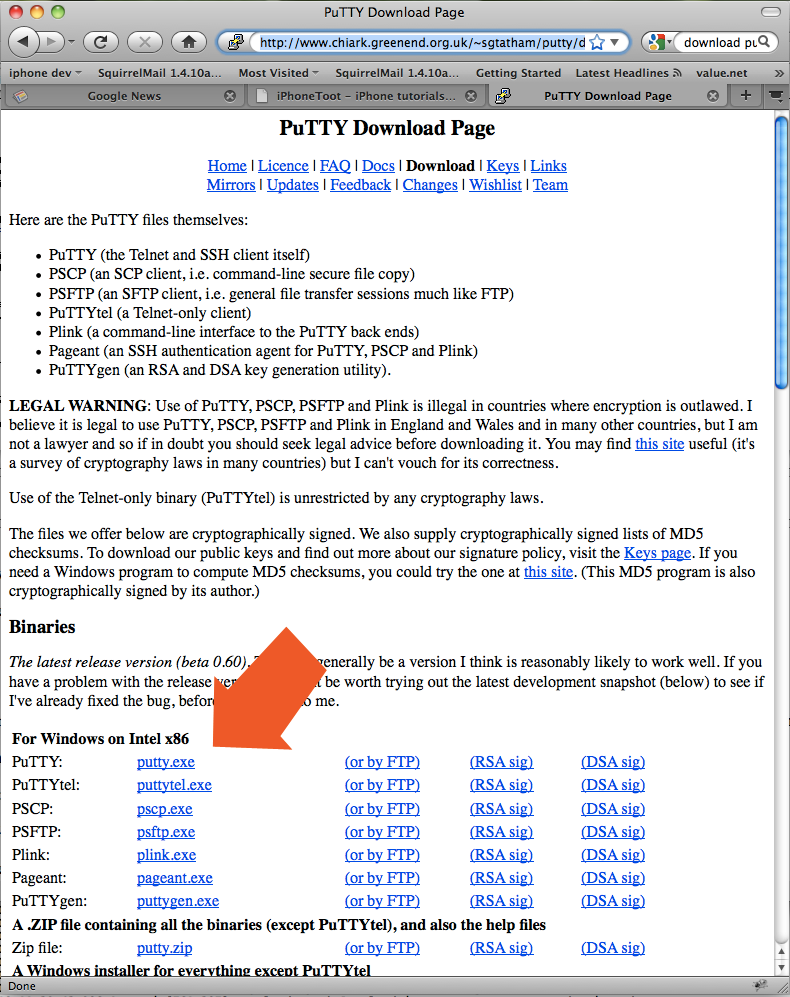
You can download putty from here: http://www.chiark.greenend.org.uk/~sgtatham/putty/download.html
Be sure to download it to the desktop, where you can find it.
If you have done this correctly, you should be able to find the "putty" icon on your desktop. It looks like this:
![]()
Start "putty".
The connection window will come up. Most of it you can ignore, but you will need to enter the server you want to connect to.

Enter "www.brandx.net" for the hostname. Have a look at the picture. Verify port=22 and connection type=SSH. If everything looks right, select "open".
The putty security alert window will come up. Click "yes" to approve the connection.
Next the unix login screen comes up. It's shown below.
You will enter your username and password when asked for them.
The computer will say: "login as" and you will answer with your username.
The computer will then ask you for the password.
The unsername and password will be given to you in class. Be sure to spell them carefully when you are loggin in or you may get stuck and have to quit Putty and try again from the start by openning a new connection.
Warning: when you type the password you won't see the letters. That's fine. There's nothing wrong. It's not broken. It's for security. Cash machines don't show your PIN when you type it. Same idea. If you panic and type your password three times it's going to consider that a mistake and it's not going to let you in.
If you have logged in correctly your screen should look something like this:

We are now talking to a server in Santa Monica. The server is running the Linux operating system. Linux is an alternative to Mac or Windows. All the commands are typed. To start a program you type the name.
If you look at the bottom of the screen you should see a line that says "bash 3.2$". This is the command interpreter. This means you are talking to Linux.
Here are some simple commands:
date <-- prints the date and time
ls <-- lists out the files in the current directory
joe <-- starts the joe editor so you can edit a file
lynx <-- starts the text only web browser called "lynx"
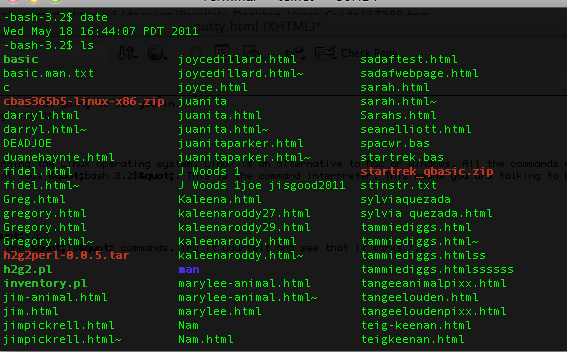
Here's an example showing where I have done the "date" and "ls" commands. Try it yourself and see that it works. The "ls" command is very useful to see what files everyone has made and to double check the spelling of names of files.

OK, we have connected to the web server. Now let's build a web page.
Let's call it mickeymouse.html
If you are following this example please name it with your own name such as fredjones.html so we know whose file is whose. Be sure to put your name on all your files so you can find them again later!
Type the following:
joe mickeymouse.html
Note that you should use a different name and not put any spaces in the middle.
Note also that exact spelling and exact capitalization are required. If your file is called "mickeymouse.html" then "Joe mick ey mou se" will not work! "Joe mackiemoose" won't work. "joE mickeymouse.html" won't work either. One wrong letter and it doesn't work.
Please only name your file mickeymouse.html if your name is mickeymouse! Otherwise things will be very confusing. Always use your own name on your files so we can find them later and know who they belong to.
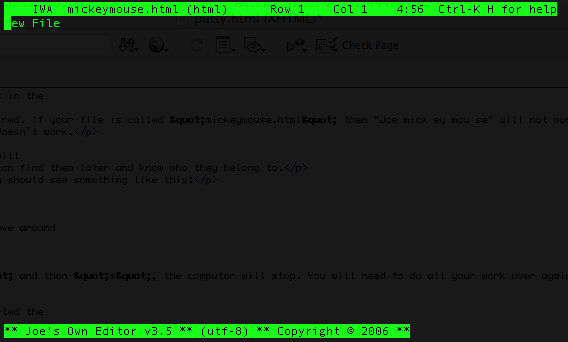
If you have successfully entered the "joe" program you should see something like this:

Type up the contents of the file. You can use the arrow keys to move around but you cannot use the mouse. Putty and Joe don't acknowledge the existence of the mouse. They use keyboard input only.
Try typing the following:
<h1>Jim's Rhino Page</h2>
Use your own name, unless you are named "jim".
When you are ready your screen should look like this:

When you are ready, save the file by hitting "crl-k" and then "s". That means, hold down the "control" key, then lightly tap "k". Then, while NOT holding the control key down, lightly tap "s" for "save".
Note: if you type "ctrl-s" instead of "ctrl-k" and then "s", the computer will stop. You will need to do all your work over again.
Joe will ask you to approve the file name you gave it when you started the program. You will see the question at the bottom of the screen. Hit enter to approve.
The computer will answer back something like "file mickeymouse.html saved". You an see this at the bottom of the screen.

Let's add a picture.
If you saved your site in the right place, then it should be visible online with a url that looks like http://www.brandx.net/lacc/caot97/students/mickeymouse.html
If you leave off the filename, and just put "http://www.brandx.net/lacc/caot97/students/" you should get a list of the files. In fact, I've made this a link, so click on it and you will see.
Here's what my file looks like when I put the correct address into internet explorer.
Most of the commands in Joe use the control key, and many start with "control-k", which is often written "^k".
^k h = help.
^k s = save your file
^k q = quit this program and return to linux
^k e = exit (save and then quit)
^k l = go to a line number. You have to add the number to the command, of course.
^k f = fine
Remember, putty and joe do not understand the mouse and pay it no attention at all.
Also, copy and paste works a little differently when you are in linux. To paste something into Linux, you have to use the mouse buttons. Right click and select copy to copy, right click and select paste to paste.
This next exercise will use that information.
We are going to add a picture. So go look on Google and find a picture that you want to use. I'm going to use this one:
http://www.leonardo.net/jim.html
To get the address: Right click on the picture.
Make sure that the image you get is a proper image, not a programming thing, or a flash, or a video, or some other funny object. Proper images names end in jpg, gif, jpeg, or png. If your name ends in something else, then find a different picture (or learn how to do a screen capture).
Also avoid images with names like AAASADAAaaaaSSsa.88a8d8a7sd87a68s7d6asdadasasda,daSDASDasda because these are usually temporary names, and the file won't ge there when you come back. You can recognize temporary names because they have a long string of letters and numbers that are nonsense. Avoid them.
Note that if you are using a picture you found in Google, you will need to find the original image, don't try to copy it from the google page or any copied image. So, right click on the image, and select "properties". From the "properties" screen find the URL. Hilight it with the mouse. Make sure you get the whole address. Often it's easiest to click after the end of the name, drag up and to the left, then let the mouse go when the whole name is hilighted.
Now right click on the name again, and select "copy". The name is copied into the copy buffer.
Now go back to your Putty and move around to the place where you want the image. The html command for an image is <img src="----"> where we will need to fill in the name.
So I put my mouse where I want the name, and right click. Bingo, it's pasted into place.
This is a lot easier than trying to retype the URL.
Here's what my page looks like now.

Save again, then go back to explorer, and reload. You should see your web page, with your title and the picture.
Here's my final result:
